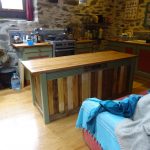
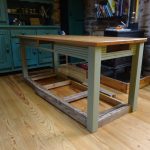
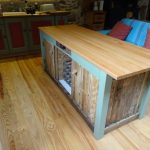
Kitchen Island
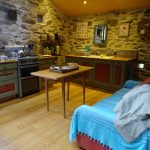
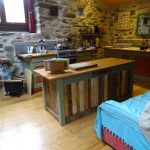
That’s it, we only have a week to go before we head North again. There is a substantial list of chores, and in true Management Consultant style they are ranked in terms of “Must do”, “Nice to” and ease to complete. At the beginning of the summer, well actually the spring, Breezy had a request to build a kitchen island to replace the table. The table has been fine for years and served us well. We have made bred and pasta on it. It has been sturdy even though it is a marriage between legs from a restaurant in Chamonix and a top from a friends office. Top and legs are now divorced and in storage awaiting their next reincarnation.
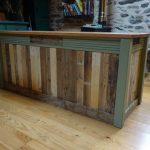
In it’s place is now a super duper kitchen island.
Ingredients:
- Legs from a salvaged table (Chamonix)
- Two lengths decking (donated by Peter in the village)
- Beech worktop (bought)
- Forklift Pallets (salvage)
- 4 brass hinges (salvage)
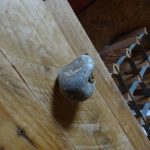
- 2 stones with holes in as handles (picked up on a beach)
- 2 leather handles (made from an old belt scout belt)
- Screws (stock items)
- Glue (bought)
- 2 sheets cheep wood (bought)
- Paint (chalk paint from a previous project)
- Varnish (left over from bathroom floor)
- Wine rack (salvage)
Mix all the ingredients together. Jump up and down on it to make sure it is sturdy and hey presto you have a kitchen island.
-
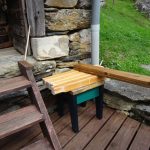
- The long serving table
-
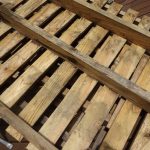
- Forklift pallets
-
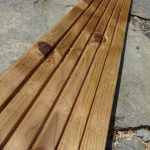
- 2 decking planks
-
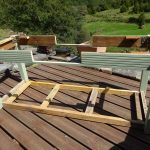
- Old table legs
-
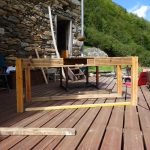
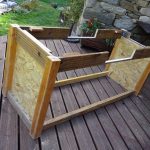
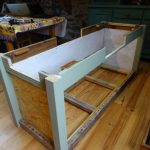
- Frame building
-
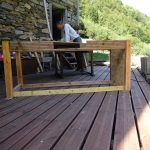
- Box in the ends
-
- Apply paint
-
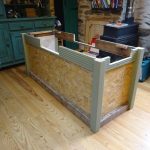
- More boxing in
-
- Paint inside white
-
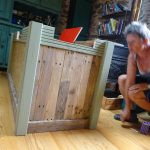
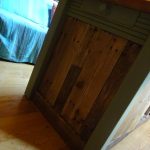
- Apply pallet wood
-
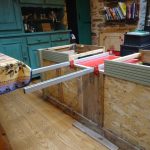
- Make a drawer space
-
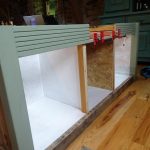
- Fit cupboard separators
-
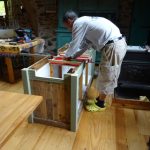
- Wear protective clothing
-
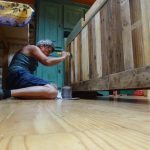
- Apply varnish
-
- Fit worktop
-
- Fit end drawer
-
- Cupboard handles
-
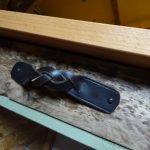
- Drawer handles
-
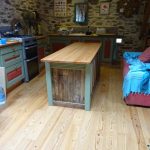
- Replace old table
-
- Fit wine rack
-
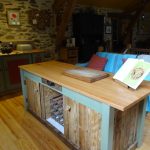
- Apply chopping board and recipe stand
-
- One new Kitchen Island